
Using iron-on transfer paper is pretty easy, but there are a few key things to note so you don’t make common transfer paper mistakes. Many issues arise when confusing the transfer paper you are using (light or dark fabric).
Common Mistakes with Iron-on Transfer Paper
- Mirroring the image
- Leaving a border or trimming around the image
- Image face up or face down when ironing
- When to apply the silicone sheet with transfer paper
- Using white in the design
- Not centering the design on a T-Shirt
- Smart irons and steam irons
- Using the wrong fabric
- Pressure and the ironing surface
- Washing T-shirts with a design on them
Use these transfer paper tips for ironing or using a heatpress.
1. MIRROR, MIRROR...
Whether you mirror an image or not, when printing on PPD Transfer Paper, depends on if you use the Transfer Paper for Light Fabrics or Transfer Paper for Dark Fabrics.

If you are new to transfer paper and graphics, mirroring an image is similar to what it sounds like: the reflection of an image to be reversed, but otherwise identical. Mirroring for T-shirts is done to apply the image on the fabric so the text will be readable.
Some printers will mirror an image in the printing setup or you can mirror it inside your graphics program before you print it.
2. TO TRIM OR NOT TO TRIM
You will need to trim your transfer paper after you print the image on it, unless it fills up the entire paper.

Trimming Transfer Paper for Light Fabrics
Since the Transfer Paper for Light Fabrics is transparent (after you iron it and peel off the backing), you can trim loosely around the design with scissors. No one will see the clear sections where no ink has been printed. This makes it ideal for intricate designs, since you won’t have to crop close to the image.
Remember to leave the backing on when you iron it for this transfer paper type.

Transfer Paper for Dark Fabrics
Since the Transfer Paper for Dark Fabrics has a white coating on the surface, you’ll need to crop close to the design. ANY white paper with no ink on it will appear on the fabric as white when you apply it with heat. This includes any white patterns inside the image.
Remember to trim before you peel off the backing with Dark Transfer Paper. The backing paper serves as a stiffener not only during the printing process as a carrier in the inkjet printer, but also to allow easy cutting with scissors or feeding it into a smart cutter. If you remove the backing too early, the transfer paper will be very floppy (not sticky, just malleable). It will be difficult to cut that way, which is why we recommend trimming the design prior to removing the backing.
3. Image Face Up or Face Down
This tip ties into the mirroring (or not) of an image. When you apply the transfer paper to fabric, you’ll want to either face the image up or turn it upside down with the backing facing you.
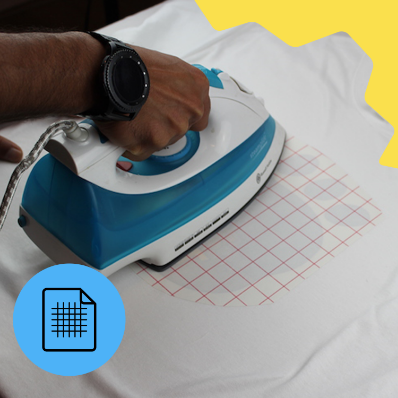
Place the image face down (Keep backing with red logos or a red grid)
Place the image face up (Remove backing with blue logos or a blue grid)
4. Silicone Sheets
Silicone is used in two ways with PPD Transfer Paper. This, again, depends upon the fabric type/paper type.
More details on the silicone Sheet product page.
Non-stick silicone paper is included with each PPD Transfer Paper packet. It is reusable and you can purchase additional sheets, if you want more on hand.
LIGHT FABRICS
DARK FABRICS
Backing
Leave backing on when ironing
Take backing off when ironing
Silicone Sheet
Use the silicone sheet after
1. ironing the image onto the fabric,
2. peeling off the red and white backing
Insert the silicone sheet between iron
and transfer paper
For Light Fabric Transfer Paper
Silicone is used after you apply the transfer paper to your fabric. First peel off the transfer paper backing from the shirt to reveal the image you just adhered to the fabric. Lay the silicone sheet on top of the transfer paper image (covering all of it), then iron directly on the silicone sheet.
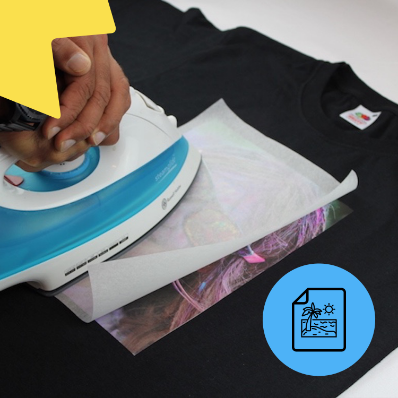
For Dark Fabric Transfer Paper
Silicone is used to protect the hot iron from the transfer paper when applying the image to your fabric. This is because the backing is removed from the transfer paper before applying it to the fabric. If you do not use the silicone sheet in between the iron and the transfer paper, then the image would stick to the iron’s soleplate.
5. White in the Design
PPD Transfer Paper is designed only for inkjet printers. The Dark Fabric Transfer Paper has a white coating on it to accept the ink. Our Light Fabric Transfer Paper does not require the same coating.
For Light Fabric Transfer Paper
Since inkjet printers do not print with white ink, you’ll need to avoid using any images with white in them when using the Light Fabric Transfer Paper. What would happen if you had any white in the design once it is applied to white or light fabric? The fabric color would show through.
For Dark Fabric Transfer Paper
In the case of the Dark Fabric Transfer Paper, any white in the design will not print. However, the white coating will show through in those spots. Remember that the white would appear in a design both where there is white in the original image and anywhere you do not have printed ink. Keep that in mind when cutting out your image.
6. Centering an Image on a T-Shirt
There is nothing worse than ruining fabric by applying the design in the wrong place.
Use the included Shirt Alignment Tool to center an image on a T-shirt. This tool – provided in every PPD Transfer Paper packet – can be resized to fit multiple shirt sizes, including baby, toddler, youth, and adult T-shirt sizes. It will help you align a printed design on a T-shirt without having to eyeball it each time.
TIP: Photo copy the template and keep the original for the instructions on the rear. That way you can cut up the template for all the different sizes you need. We’ll soon have an image online that you can print, in case there isn’t a copy machine handy.
You can learn How to Use the Shirt Alignment Tool in our helpful YouTube video or see more in our Tips for Using Iron-On Transfer Paper blog.
7. Smart Irons & Steam Irons
Do not use a steam iron. Use a dry iron with any PPD Transfer Paper.
Do not use a smart iron. Smart irons can fluctuate temperatures automatically. You need an iron to remain at the highest setting (at least 1500W) for a successful transfer to the fabric.
8. Fabric Types
Photo Paper Direct Transfer Paper should be applied with high heat to fabric. That means your fabric needs to withstand high temperatures, too.
In addition, you’ll want to make sure that you are matching the right transfer paper type to your fabric (light or dark). If the tips here raise more questions about this, we made a video about Choosing Transfer Paper Types that should help you.
9. Ironing Boards & Pressure
Do not use an ironing board. It will give too much. You need a flat, hard surface that is heat-resistant and can withstand hard pressure.
We found it helpful to add a spare/old T-shirt on top of the surface where you will iron. This provides a slight cushion and should also protect your new fabric. Also, be sure you aren’t using a wood table with any oiled or stained surface. The heat can cause discoloration in fabric by picking up the stain and adding it to fabric.
Press down as hard as you can during the ironing process. The transfer may not complete when you do not press hard with the iron.
If you are using a handheld heat press, one that you move around like an iron (including Cricut and other manufacturer’s designs), you will want to treat it as if it were an iron. Don’t follow the heat press instructions when using that; follow the ironing instructions instead.
10. Washing T-Shirts
Wash your T-shirt with its applied transfer paper image in 104°F (40°C) on a regular cycle. Turn the T-shirt inside out for best results. Do not wash it in the delicate cycle. Use the dryer; do not hang to dry. We made a YouTube video with more details, for those who want to learn more.
Still have questions about transfer paper? Check out our YouTube video for more information on How to Use Transfer Paper or review our transfer paper blog tips.
Be sure to tag #MadewithPPD when you share your T-shirt or creative artwork on social media. We want to see what you made!